


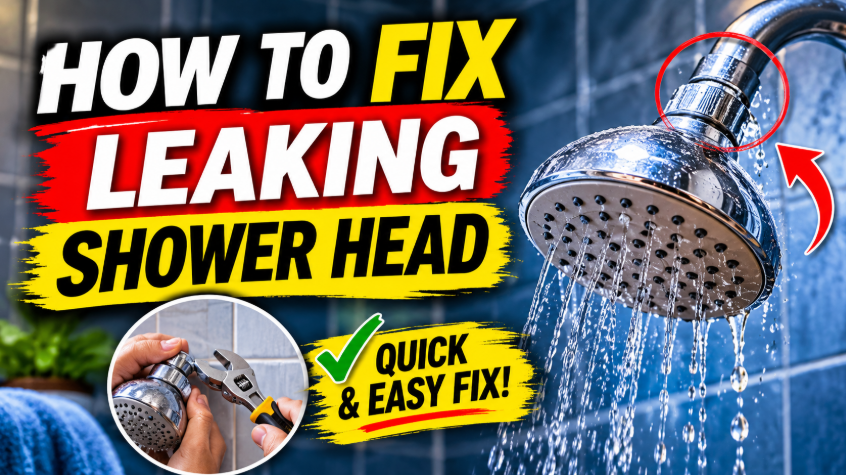

A leaking shower head can waste water, increase your bills and become an annoying problem in your bathroom. Fortunately, you can often fix it without calling a plumber. In most cases, the problem comes from a worn washer, limescale build-up, a loose connection or a faulty shower valve. Learning how to fix a leaking shower head starts with identifying where the water comes from. Once you understand the cause, you can choose the right repair and avoid replacing parts unnecessarily.
Whether your shower drips after you turn it off or leaks around the connection, several simple solutions can help. This guide explains how to identify the problem, repair common faults and prevent future leaks. It also covers situations where professional plumbing help may be necessary.
How to Fix a Leaking Shower Head
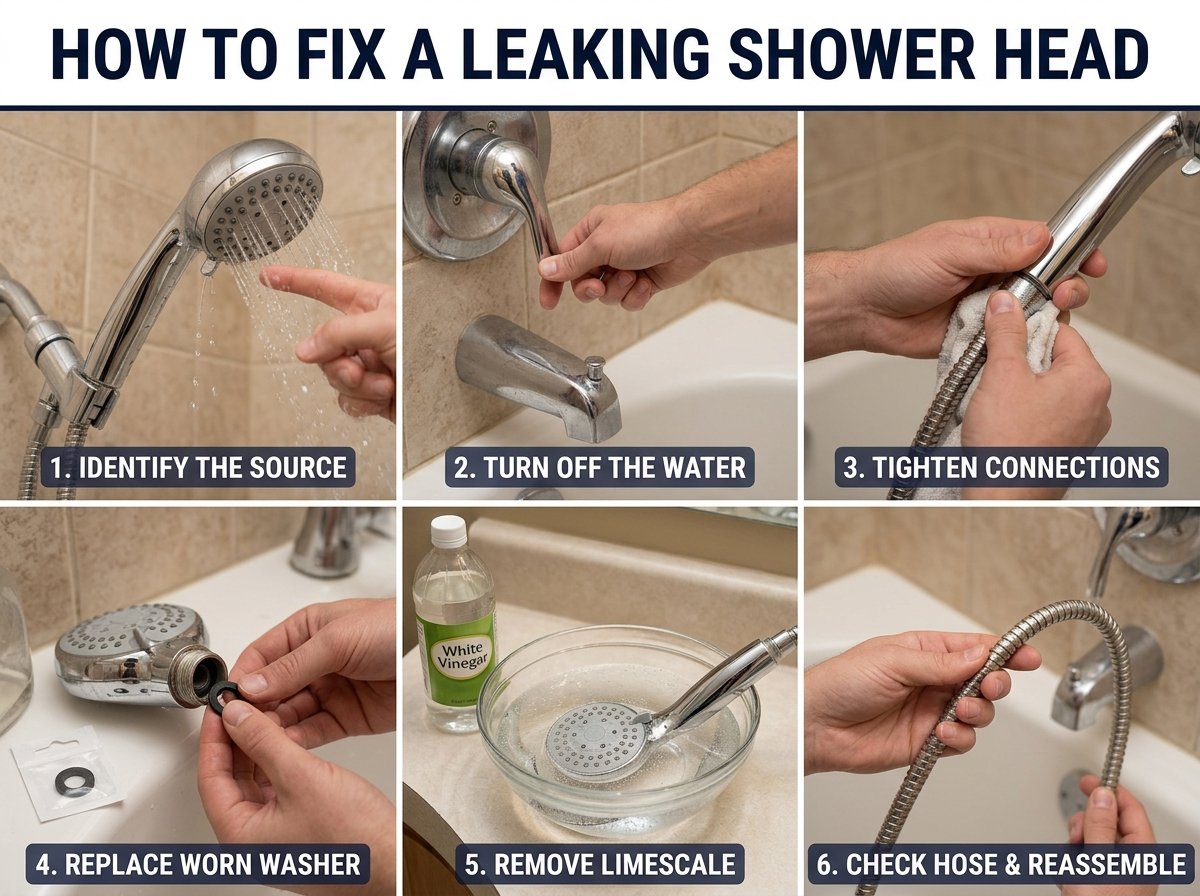
Before attempting a repair, identify exactly where the water is escaping. Turn off the shower and observe the shower head, hose and connecting points. A leak from the spray nozzles usually has a different cause from water escaping around the hose connection.
If water continues dripping from the shower head after the shower is switched off, the shower valve may not be closing properly. However, a small amount of remaining water can drain naturally after use. This does not always indicate a fault.
Start by checking whether the dripping stops after a short period. If it continues for several minutes or repeatedly returns, investigate further.
Step 1: Identify the Source of the Leak
The first step is to locate the leaking area. Look carefully at the shower head while the water is running. Check whether water escapes through the spray holes, around the swivel joint or from the hose connection.
A leak around the shower head connection often indicates a damaged washer or loose fitting. Meanwhile, uneven spraying or water escaping from blocked nozzles may indicate limescale build-up.
If water continues flowing after you turn off the shower, the internal valve may have a damaged seal or cartridge. Identifying the source first helps you avoid unnecessary repairs.
Step 2: Turn Off the Water Supply
Before removing the shower head, make sure the water is switched off. For a mixer shower, turn the controls to the off position. If you need to work on the shower’s plumbing connections, isolate the appropriate water supply first.
Electric showers require additional care because they combine water and electricity. Switch off the electrical supply at the dedicated isolator before carrying out any work that involves opening the shower unit.
Never remove the electrical casing or attempt to repair internal electrical components yourself. These repairs should be handled by a suitably qualified professional.
Step 3: Tighten Loose Shower Connections
A loose connection is one of the easiest shower leaks to fix. Water may escape where the shower head connects to the shower arm or flexible hose.
Carefully check the connection by hand. If it feels loose, gently tighten it. Avoid applying excessive force because plastic fittings and threaded connections can crack or become damaged.
If tightening does not stop the leak, remove the shower head and inspect the sealing washer. A missing, flattened or damaged washer may prevent the connection from sealing correctly.
For threaded connections that require resealing, use suitable PTFE tape only where the fitting design requires it. Do not use tape as a substitute for a missing or damaged rubber washer.
Step 4: Replace the Worn Shower Head Washer
A worn washer is a common reason for water leaking around shower connections. These small rubber components create a seal between connected parts. Over time, heat, pressure and regular use can cause them to flatten, crack or deteriorate.
To replace one, carefully unscrew the shower head from the hose or shower arm. Look inside the connecting end for a rubber washer.
Remove the old washer and inspect its condition. Take it to a plumbing supplier if you are unsure about the correct replacement size. The new washer should fit securely without stretching or folding.
Place the replacement washer inside the connection and reattach the shower head. Tighten it gently, then turn the water on and check for leaks.
If water still escapes, check whether the washer sits correctly. A poorly positioned seal can allow water to pass through the connection.
Step 5: Remove Limescale From the Shower Head
Limescale can build up inside shower nozzles, especially in areas with hard water. This mineral deposit can block spray holes and affect water distribution.
As a result, water may spray sideways or escape around the edges of the shower head. Cleaning the shower head can restore a more consistent spray.
For a removable shower head, take it off the hose and check the manufacturer’s cleaning instructions. You can often soak suitable shower head components in a solution of white vinegar and water.
Leave the removable part to soak for a suitable period, depending on the manufacturer’s guidance. Afterwards, rinse it thoroughly and gently remove loosened deposits with a soft brush.
Avoid using vinegar on materials or finishes that may react with acidic cleaners. Some manufacturers recommend specific cleaning products instead.
For a fixed shower head, use a suitable cleaning method that does not damage the finish or surrounding surfaces.
Step 6: Check the Shower Hose and Connections
Sometimes, the shower head is not responsible for the leak. Water may escape from a damaged flexible hose or one of its connecting joints.
Inspect the entire hose for cracks, splits, bulges and worn sections. Pay particular attention to the areas near the connecting nuts, where repeated movement can cause damage.
If the hose itself leaks, replacing it is usually more effective than attempting to seal a damaged section. Choose a compatible replacement with suitable connections and dimensions.
Before installing the new hose, check that the sealing washers are present at both ends. Tighten the connections carefully and test the shower.
Why Does My Shower Head Keep Dripping After I Turn It Off?
A shower head that drips after use does not always have a faulty component. Water can remain inside the shower head and hose after the water supply stops.
Gravity gradually releases this trapped water through the spray holes. This is particularly noticeable with larger shower heads and overhead rainfall showers.
However, continuous dripping may indicate a problem with the shower valve. A worn cartridge, damaged seal or faulty internal mechanism can allow water to pass through when the shower should be closed.
Mixer showers commonly use internal cartridges or valves to control water flow. If these components deteriorate, water may continue entering the shower outlet.
If the dripping never stops, have the valve inspected. Replacing an internal cartridge may solve the problem, but the correct component depends on the shower model.
How to Fix Different Types of Leaking Showers
Different shower systems use different components. Therefore, the correct repair depends on the type of shower installed in your bathroom.
Fixing a Leaking Mixer Shower
A mixer shower combines hot and cold water through a single shower unit. If the shower head continues dripping after you switch it off, the internal valve or cartridge may be worn.
Start by checking the shower head connection and washer. If these components are in good condition, the problem may be inside the mixer valve.
Cartridge replacement requires the correct part for your particular model. If you cannot identify the component or access it safely, contact a plumber.
Fixing a Leaking Electric Shower
Electric showers heat water inside the shower unit. A leak may come from the hose, shower head, external connections or an internal component.
Check the hose and shower head connections first. These are external parts that may be inspected without opening the electrical casing.
If water escapes from the shower unit itself, stop using it and switch off its electrical supply. Do not remove the casing or attempt an internal repair.
A qualified electrician or appropriately competent shower engineer should inspect the unit.
Fixing a Leaking Rainfall Shower Head
Rainfall shower heads often have larger spray surfaces than standard shower heads. They can retain more water after use, which may cause temporary dripping.
Allow the remaining water to drain before assuming there is a fault. If the shower continues dripping, inspect the connections and check for limescale.
A damaged washer or faulty valve may also cause persistent leaking. Always check the manufacturer’s instructions before removing a fixed rainfall shower head.
When Should You Call a Professional Plumber?
Many shower head leaks involve simple external components. However, some problems require professional attention.
Contact a plumber if the leak continues after replacing the washer and checking the connections. Persistent dripping may indicate a faulty cartridge, damaged valve or internal plumbing problem.
You should also seek professional help if water escapes from inside the shower unit, behind the wall or around concealed pipework.
Do not ignore leaks that cause damp patches, mould or damage to ceilings and walls. Hidden water leaks can become more expensive if they remain untreated.
For electric showers, never attempt repairs involving internal electrical components. Water and electricity create serious safety risks, so professional inspection is essential.
How to Prevent Your Shower Head From Leaking Again
Regular maintenance can reduce the chances of another shower leak. Clean the shower head periodically to prevent mineral deposits from blocking the nozzles.
Check the flexible hose and connections for visible damage. Replace worn washers when necessary instead of waiting for water to escape.
Avoid overtightening plastic connections. Excessive force can damage threads and create new leaks.
It also helps to follow the manufacturer’s cleaning and maintenance instructions. Different shower heads use different materials, finishes and internal components.
Finally, investigate small leaks as soon as you notice them. Early repairs can prevent water damage and unnecessary water waste.
Conclusion
Learning how to fix a leaking shower head can save time, reduce water waste and prevent unnecessary repair costs. Start by identifying the source of the leak, then check the connections, washers, hose and spray nozzles.
In many cases, replacing a worn washer, tightening a loose fitting or removing limescale solves the problem. However, persistent dripping may indicate a faulty shower valve or internal component.
Always follow the manufacturer’s instructions and take extra care with electric showers. If the leak comes from inside the unit or concealed plumbing, contact a qualified professional.
FAQs
How do I fix a leaking shower head without replacing it?
You can often fix a leaking shower head by tightening loose connections, replacing a worn washer or cleaning blocked spray nozzles. First, identify where the water escapes. If the shower continues dripping after these repairs, the internal valve may need attention.
Why does my shower head drip after I turn it off?
A shower head may drip temporarily because water remains trapped inside the hose and spray head. However, continuous dripping can indicate a worn valve, damaged cartridge or faulty seal. Check whether the dripping stops naturally before investigating further.
Can a worn washer cause a shower head to leak?
Yes. A worn, flattened or damaged washer can allow water to escape around the shower head connection. Replacing it with a compatible washer often fixes this type of leak. Make sure the replacement sits correctly before tightening the connection.
How do I stop my shower head from leaking around the connection?
Unscrew the shower head and inspect the rubber washer inside the connection. Replace it if it looks damaged or flattened. Reattach the shower head and tighten it gently. If the connection still leaks, check for damaged threads or an unsuitable fitting.
Does limescale cause a shower head to leak?
Limescale can block spray holes and affect how water flows through a shower head. This may cause uneven spraying or water escaping from unexpected areas. Cleaning the shower head with a manufacturer-approved descaling method can help restore normal water flow.
Is a leaking shower head an emergency?
A small leak from an external shower head connection is not usually an emergency. However, water leaking from an electrical shower unit, concealed pipework or behind a wall needs prompt attention. Stop using the affected shower and seek professional help if there is a safety risk or significant water damage.
For more updates visit: RANKIVO