




The Metroid Prime 4 walkthrough helps you navigate Viewros, unlock Samus Aran’s abilities, defeat dangerous bosses and discover hidden upgrades in Metroid Prime 4: Beyond. Your journey takes you through unfamiliar environments, ancient technology and challenging combat encounters. Progress often depends on finding a new ability and returning to an area you could not fully explore earlier.
The key to making steady progress is to scan important objects, study your map and revisit locations after unlocking new equipment. This guide explains the main progression route, essential upgrades, boss strategies and collectible tips. It also highlights common mistakes that can slow your adventure or prevent you from completing your logbook.
Learn the Scan Visor and Combat Controls
The opening section introduces Samus to combat and exploration. Follow the objectives through the Galactic Federation research facility, defeat hostile enemies and scan important characters, creatures and technology. Scanning provides information about the world and can contribute to your logbook completion.
Pay attention to the tutorial prompts before rushing into fights. Locking onto enemies makes combat easier, while free aiming helps you target specific weak points. Learn when to dodge, charge your beam and use missiles rather than relying on one attack throughout every encounter.
The opening boss, Aberax, teaches you to recognise exposed weak points. Focus your attacks on the vulnerable areas and avoid standing still when the enemy launches an attack. Scan the boss before defeating it if you want to preserve the opportunity to record its entry.
Explore Chrono Tower on Viewros
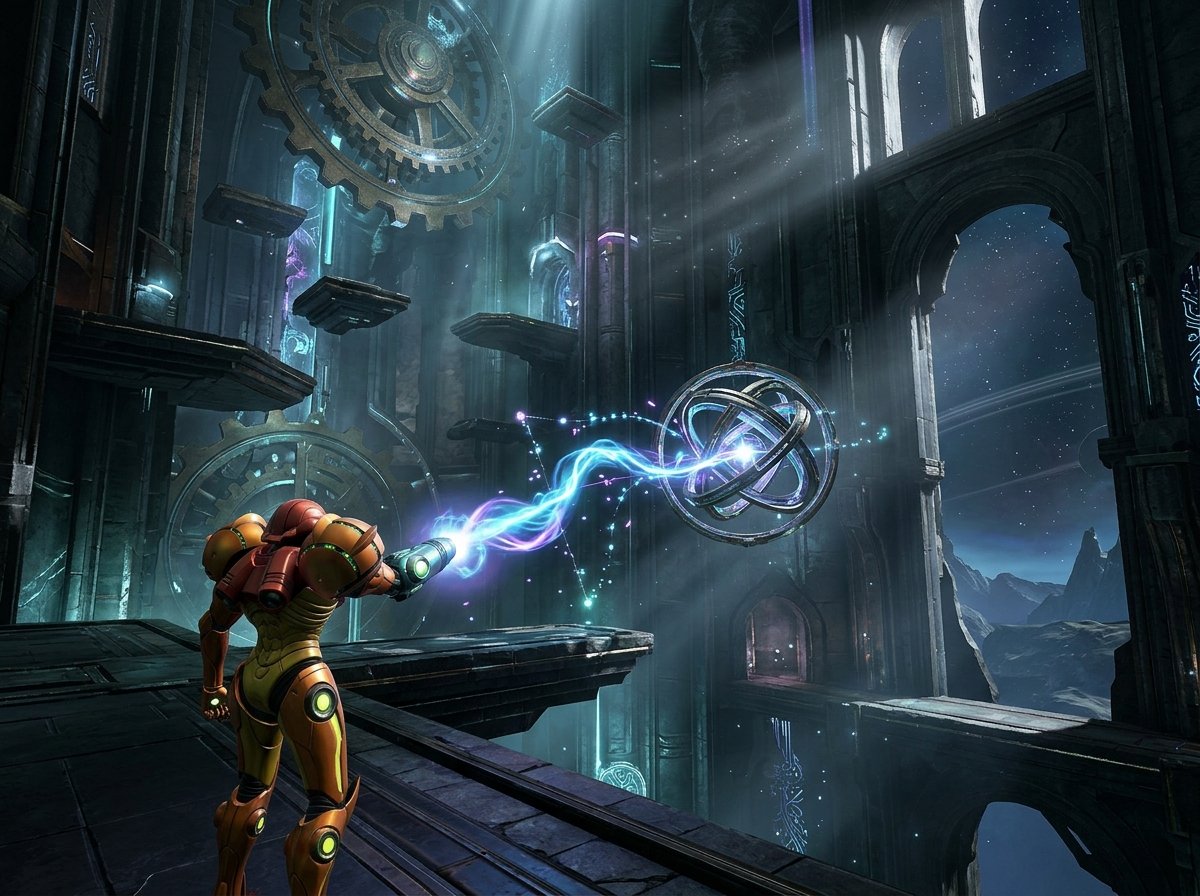
After the opening events, Samus reaches Viewros and begins exploring Chrono Tower. This section introduces the game’s psychic abilities and the mysterious Lamorn technology.
Follow the main route, examine unusual objects and learn how to manipulate switches with the Control Beam. Some puzzles require you to guide a projectile towards a target instead of firing directly at it. Take your time to understand this mechanic because it becomes important in later areas.
During the encounter with Carvex, concentrate on the vulnerable sections of its tentacles. Destroy the relevant weak points and use the Control Beam when the central target becomes exposed. After the battle, continue through the area to obtain the next key items and advance the story.
Fury Green and Your First Important Upgrades
Fury Green introduces more environmental puzzles, hidden paths and opportunities to collect upgrades. Explore the jungle carefully instead of following the main route without looking around.
Scan unfamiliar plants, machines and ancient objects whenever possible. Some entries become difficult or impossible to recover later, so scanning during your first encounter is a useful habit. Also, look for Morph Ball passages, destructible barriers and objects that react to your newly acquired abilities.
Your progress eventually brings you back to Myles, who helps Samus obtain the Fire Shot after the required Fire Chip has been recovered. This upgrade allows you to interact with fire-based locks and burn certain barriers. Return to earlier rooms to discover newly accessible items.
Backtracking is an essential part of the Metroid Prime formula. A blocked door does not necessarily mean you missed a secret or took the wrong route. It may simply require an ability you have not unlocked yet.
Volt Forge and Unlocking Vi-O-La
Volt Forge focuses on industrial machinery, electrical hazards and environmental puzzles. Study moving platforms and nearby consoles before attempting to cross dangerous sections. Some mechanisms require the Control Beam, Morph Ball bombs or carefully timed movement.
During this part of the adventure, you unlock Vi-O-La, Samus’s vehicle for travelling across Sol Valley. Use it to move between major locations and explore the desert for Green Energy Crystals. These resources can contribute to later upgrades, so collecting them during normal travel saves time.
You will also encounter challenging mechanical enemies. Against the Flight Drone, focus on the surrounding drones and its protective components before concentrating your attacks on the main target. When facing Sylux, keep moving, dodge incoming attacks and respond to his spinning manoeuvre with the appropriate Morph Ball tactic.
After progressing through the area, the Psychic Boots provide another important exploration upgrade. They allow Samus to perform an additional jump and reach certain psychic platforms. Once again, revisit earlier rooms to uncover paths that were previously out of reach.
Ice Belt Walkthrough and the Ice Shot
Ice Belt introduces freezing conditions, hostile wildlife and laboratory puzzles. Move carefully through outdoor sections, then inspect indoor rooms for vents, locked doors and alternative routes. Your Scan Visor can help identify objects that interact with the environment.
Some doors in the research areas require you to locate access codes or restore power. Explore connected rooms thoroughly before assuming the main route is blocked. Check consoles, scan data entries and look for Morph Ball tunnels that connect different parts of the facility.
The Ice Belt boss, Keratos, rewards patience. Watch its movement and avoid its rolling attack. When it becomes stuck against an ice wall, use the opening to target its vulnerable underside. Defeating it allows you to obtain the Psychic Boost Ball, which expands your options for movement and puzzle solving.
Continue exploring the area and collect the Ice Chip when the necessary route becomes accessible. Once you have the required item, return to the appropriate location to advance the story and unlock further equipment.
Flare Pool and the Thunder Shot
Flare Pool introduces intense heat, lava hazards and more demanding combat encounters. Before entering dangerous rooms, check your available health and ammunition. Use the map to understand the layout, and avoid rushing across platforms without watching enemy attack patterns.
As you progress, you will encounter puzzles that combine your existing abilities. You may need to manipulate an object, position it correctly and then use an elemental shot to activate a mechanism. If a puzzle seems impossible, consider whether you have overlooked a switch or need to return after acquiring another upgrade.
The Phenoros battle requires different tactics across its stages. While riding Vi-O-La, target the marked weak points. During the next phase, focus on the vulnerable areas around its face and tongue while avoiding its fire attacks. Morph Ball movement can help you evade certain attacks. When the opportunity appears, use the Control Beam to strike the exposed weak point.
Continue advancing to obtain the Psychic Grapple and other important equipment. New abilities open additional routes, so revisit earlier locations when your progress slows.
Great Mines and the Final Stages
The Great Mines brings together many of the mechanics introduced earlier. Expect more complicated traversal challenges, enemies, locked routes and puzzles involving multiple abilities. Use Spider Ball rails to navigate certain surfaces, and combine Morph Ball movement with your other tools to reach elevated platforms.
Super Missiles help remove particular barriers and expose routes to additional upgrades. Meanwhile, the Psychic Grapple allows you to reach grapple points that were previously inaccessible. If you reach a dead end, inspect nearby walls, ceilings and map connections before backtracking to a different area.
As you approach the final stages, check your equipment and collect any useful Energy Tanks or ammunition expansions along the way. Extra health can make difficult boss encounters more manageable, especially when you are still learning attack patterns.
The final boss is easier to approach when you understand your abilities and remain patient. Observe its attack cycle, look for vulnerable moments and use the correct weapon or psychic ability when an opening appears. Avoid wasting ammunition during protected phases. If you struggle, return to earlier areas and collect upgrades before trying again.
How to Find Collectibles and Work Towards 100% Completion
Completing the main story and finding every collectible are different goals. A completion-focused run requires more attention to Energy Tanks, Missile Expansions, Shot Expansions, Green Energy Crystals, scan entries and other hidden items.
Scan bosses and unusual enemies before defeating them whenever possible. The same rule applies to unique machines, environmental objects and Lamorn technology. Some encounters may not offer another opportunity to record the same entry, so make scanning part of your regular routine.
Green Energy Crystals are worth collecting as you travel through Sol Valley. You can use collected resources at the relevant upgrade location to improve your equipment. Avoid spending too long searching every corner immediately, however. Certain collectibles remain inaccessible until Samus gains the right ability.
Scout Bots can help with later collectible hunting by revealing remaining items on the map after you unlock and activate them. Use this feature when you want to finish areas you have already explored rather than searching every room blindly.
Keep checking your map after receiving an upgrade. Previously blocked doors, suspicious openings and unexplored sections may now contain useful items. A systematic return through earlier locations is often more efficient than wandering without a plan.
Essential Tips for a Smoother Playthrough
The most useful habit is to scan first and shoot second. Scans provide clues about enemy weaknesses, environmental mechanisms and important discoveries. They also help you keep track of logbook progress.
Use your map frequently, particularly when moving between Sol Valley and the game’s major areas. Mark unexplored rooms mentally and revisit them when you obtain a new weapon or movement ability. If you cannot progress, check your current objective and look for an uncompleted puzzle before assuming you need to fight more enemies.
Conserve missiles for situations where they offer a clear advantage. Standard beam attacks may work well against ordinary enemies, while powerful weapons can help you exploit boss weaknesses or destroy specific barriers. Learn each enemy’s behaviour instead of repeatedly attacking from the same position.
Finally, adjust the control settings to suit your preferred play style. The available options depend on your version and hardware. Comfortable controls can make precise aiming, movement and boss encounters much easier.
Conclusion
This Metroid Prime 4 walkthrough provides a clear route through the major areas, from the opening Federation facility and Chrono Tower to Fury Green, Volt Forge, Ice Belt, Flare Pool and the Great Mines. Progress depends on learning Samus’s psychic abilities, collecting important upgrades and revisiting locations when new paths become available.
For the smoothest experience, scan important discoveries, study your map and prepare for boss encounters by learning their attack patterns. If you want 100% completion, make collectible hunting a regular part of your adventure rather than leaving every hidden item until the end.
FAQs
How long does Metroid Prime 4 take to complete?
Completion time depends on your play style and how thoroughly you explore. Following the main story generally takes less time than finding every collectible, completing the logbook and revisiting every accessible area.
What is the best way to progress in Metroid Prime 4?
Follow your current objective, scan important objects and check the map whenever you become stuck. Many blocked routes require an upgrade that you obtain later in the story, so revisit them after acquiring new abilities.
Can you miss scan entries in Metroid Prime 4?
Some scan entries are missable because certain enemies or encounters may not appear again in the same way. Scan unique creatures, bosses, characters and technology during your first encounter to reduce the risk of an incomplete logbook.
What are Green Energy Crystals used for?
Green Energy Crystals are collectible resources found during exploration, particularly around Sol Valley. Take them to the relevant upgrade location to contribute towards equipment improvements as your adventure progresses.
How do you defeat bosses in Metroid Prime 4?
Study each boss’s attack patterns and look for exposed weak points. Use the correct weapon or ability when an opening appears, dodge dangerous attacks and avoid wasting ammunition when the boss is protected.
Is this Metroid Prime 4 walkthrough suitable for 100% completion?
It explains the main progression route and essential collectible strategies, but it is not a room-by-room list of every item. For complete 100% tracking, use a dedicated area-by-area checklist alongside this guide and revisit locations after unlocking new abilities.
For more updates visit: RANKIVO